Two Sides Mode – How to Use
To validate a Workbook Set in the Two Sides Mode:
- Open the Workbook Validation tab.
-
Click New Workbook Set... icon in the toolbar, or right-click somewhere in the Workbook Set table and choose New Workbook Set... in the context menu, or press Ctrl + N keyboard shortcut.
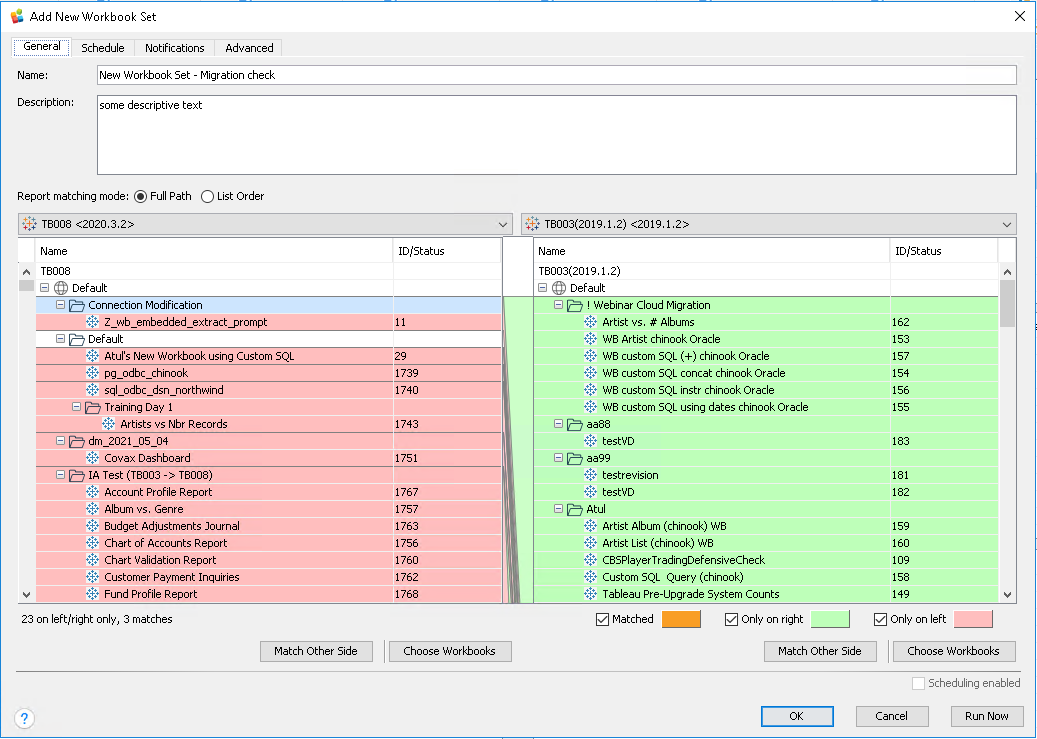
The Add New Workbook Set dialog window opens:
Read here for details.
General Tab
- Specify Name, for example: New Workbook Set - Migration check.
- Specify Description, for example some descriptive text.
- Choose Matching mode, read here for details.
-
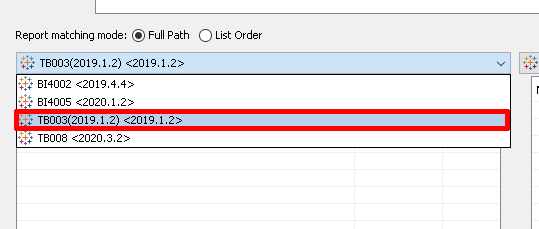
Choose an environment for the left target in the selector (e. g., TB003):
-
Click Choose Workbooks below the left target.
The Choose Workbooks dialog window opens:
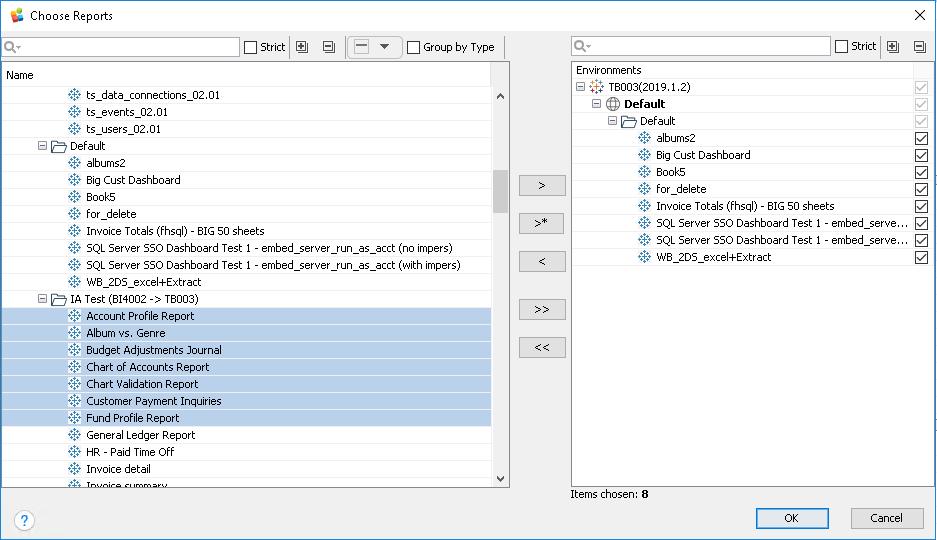
In this dialog window, select workbooks for the left target. Read here for details.
-
Choose an environment for the right target in the selector.
If you wish to validate workbooks between two environments, choose another environment than in the left target.
If you wish to validate workbooks between two sites of the same environments, choose the same one. It makes sense if you choose the List order matching mode.
-
Click Choose Workbooks below the right target.
The Choose Workbooks dialog window opens.
In this dialog window, select workbooks for the right target. Read here for details.
Workbook Validation tries to match workbooks between left and right targets.
-
You may want to click Match Other Side to exclude workbooks found inserted (only on right) and deleted (only on left) and keep changed workbooks only.
This is a convenient feature that will match and bring the exact same content over your environments.
-
Click the Schedule tab.
Schedule Tab
The Schedule tab opens:
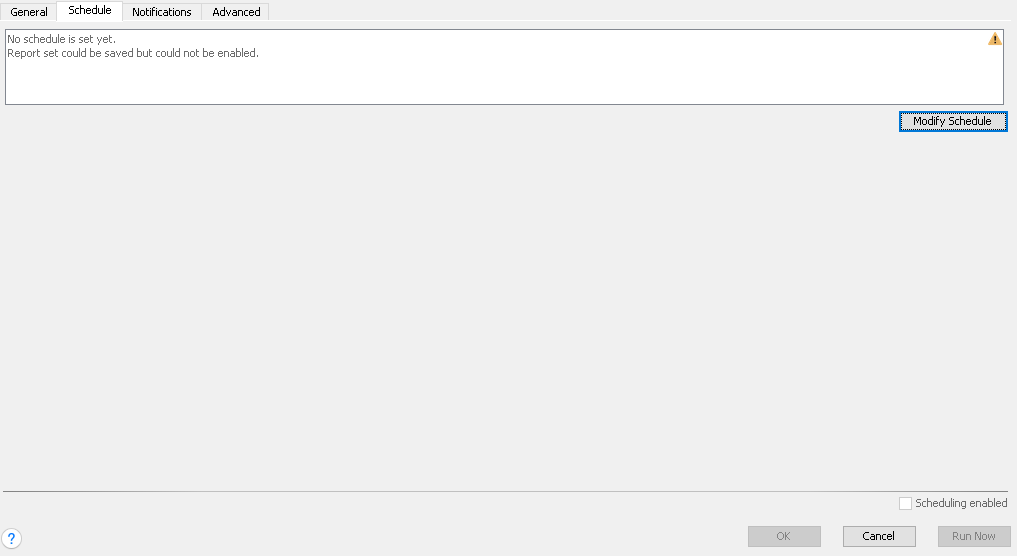
Schedule is very important for automated workbook validation to run this validation on a daily (hourly, weekly) basis.
-
Click Modify Schedule.
The Workbook Set Schedule dialog window opens:
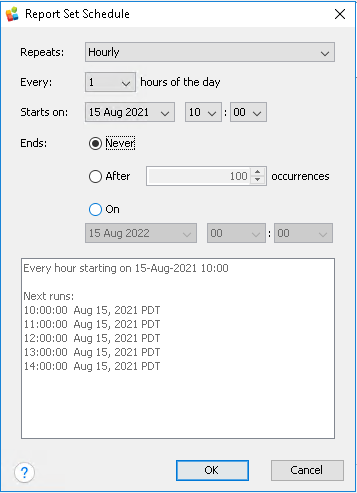
It is similar to the Alert Schedule dialog window.
-
Repeats: choose a time measurement unit – hourly
-
Every: choose an integer value from a list box ‐ 1 for 1 hour interval
-
Starts on: choose date and time when this validation should run for the first time. The timestamp will be saved with a timezone set on your MMTE Server system.
-
Ends: Never for continuous usage, After X occurrences or On <timestamp> for limited usage
Check in the text area below the resulting data: overall description of the schedule and next five runs.
-
-
Click OK.
-
Set the Scheduling enabled checkbox for automatic execution of this Workbook Set validation. You cannot enable workbook sets without schedules.
-
Click the Notifications tab.
Notifications Tab
Here you can configure email and/or SMS notification should you have a discrepancy in your Tableau workbooks.
The Notifications tab opens:
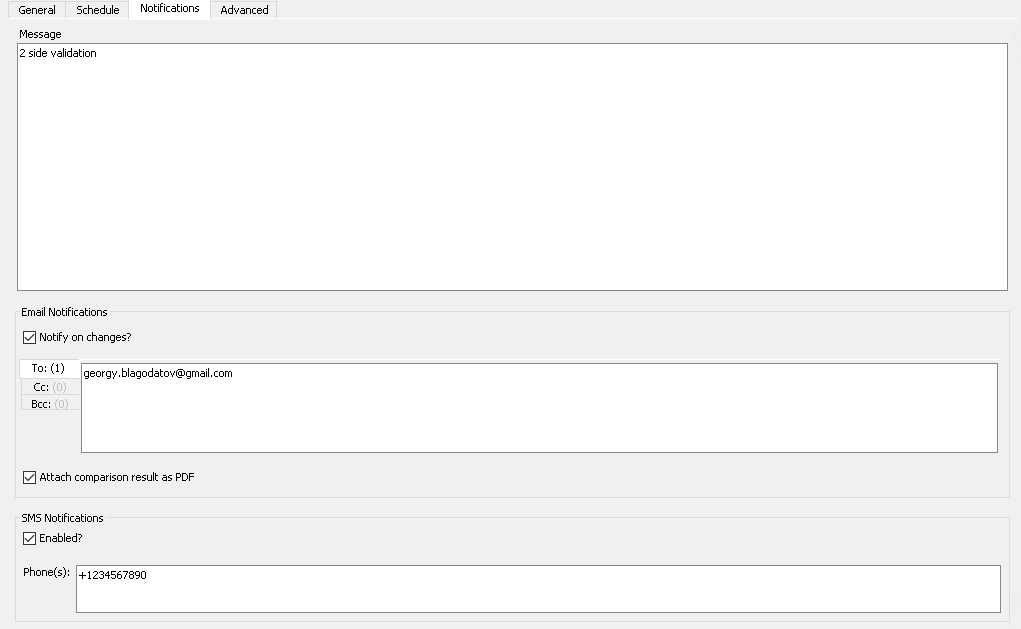
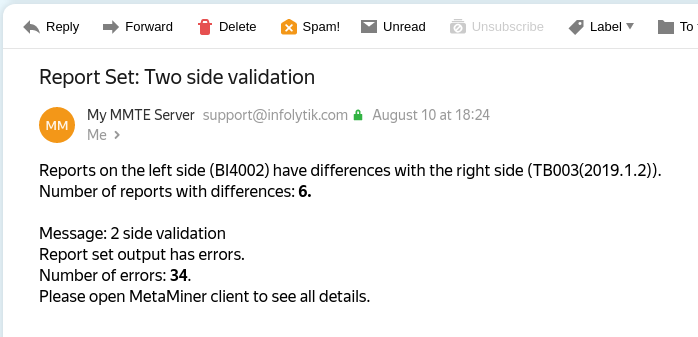
- Specify Message, for example: 2 side validation. This text will be sent inside the email and/or SMS notifications in the line titled Message:
-
If you need notifications by email, edit the Email Notifications group settings:
-
Notify on changes? if checked, email notification(s) will be sent
-
To: specify one or more recipients (email addresses)
-
Cc: specify one or more email addresses to send a carbon copy
-
Bcc: specify one or more email addresses to send a blind carbon copy
The sender name will be taken from the Email Header Text setting specified in MMTE Administrator.
- Attach comparison result as PDF: set this checkbox to send the comparison results with each email message.
comparepdfcmdis required for this option. Ifcomparepdfcmdis not installed, the PDF will not be sent.
-
-
If you need notifications by SMS, edit the SMS Notifications group settings:
-
Enabled? if checked, SMS notification(s) will be sent
-
Phone(s): specify one or more phone numbers (MSISDN); spaces, commas, etc will be treated as separators
-
-
Click the Advanced tab.
Advanced Tab
This tab allows you to configure additional parameters of the workbook validation process.
-
In the Output Options section:
-
Generate PDF: enable workbook validation via conversion to the PDF format
-
Generate XML: enable workbook validation via conversion to the XML format
At least one checkbox must be set.
-
-
In the PDF Compare Options section:
-
Stop comparing two PDF files after following number of differences: set this checkbox if you want to set a limit of differences after which the PDF comparison process will stop. If set, the following field becomes editable:
-
Maximum number of differences hint: specify an integer limit
If you use the Attach comparison result as PDF feature (see above), you may want to leave this setting unlimited to see all found differences in the attached file. Or specify more or less high value to avoid unneeded calculations when workbooks are completely different.
If you do not use the Attach comparison result as PDF, it makes sense to set this limit to 1. It is enough to assume that workbooks are different and to speed up the comparison process.
-
-
Click OK to save a new Workbook Set or click Run Now to save and run validation immediately.
Using Diff Navigator
After a Workbook Set is created and run at least once, there should be at least one row for it in the Table of Validation Results.
-
Select the latest row in the Table of Validation Results.
-
Look at the Diff Navigator. In it, compare outputs. This is the most critical step of the whole process that allows you to visually render any deltas in actual output. Workbook Validation shows you in yellow where the actual delta exists.
-
Find the first workbook indicated as changed (marked in yellow).
-
Double-click this workbook or right-click it and choose Compare Outputs (double click) from the context menu.
The Loading Workbook Outputs Diff... pop-up opens.
-
Wait while this diff loads. Then, the Output Comparison dialog window opens.
Using Output Comparison
In this dialog window, inspect the changes between your workbooks visually, page by page.
You can quickly find the pages with changes, because they have a yellow background in the navigation bar:
Or click the Next / Previous Change icons in the toolbar.
Use Zoom to look deeply into the differences.
Read here for further details.
Compare Metadata
When your find workbook instances with important changes, you can look even deeper into these changes.
For this, open Tableau Explorer, locate and select these workbook instances, and run Workbook Diff command from the context menu.
The Workbook Diff dialog window opens.
Use the Metadata tab to view the source data differences that cause the discrepancies you found before.