New Alert
The New Alert command is used for adding new alerts in the Alerts tab.
To run this command, do the following:
-
Right-click any row in the table of alerts and choose New Alert from the context menu, or
Click New Alert... in the toolbar, or
Press Ctrl + N keyboard shortcut.
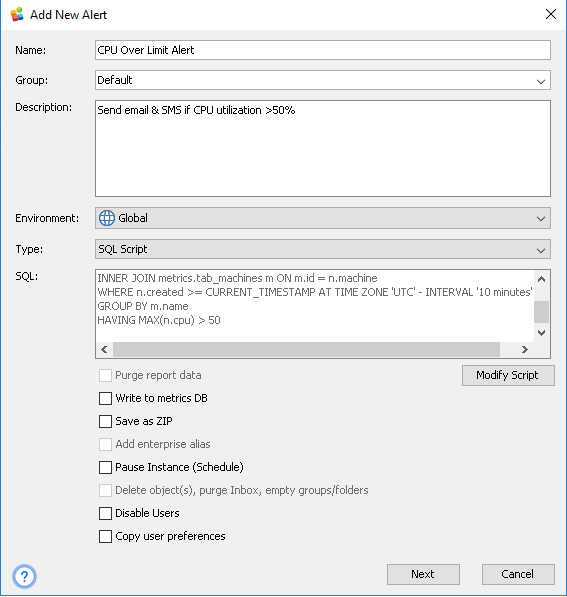
The first step of the Add New Alert dialog window opens (it is multi-step). This step lets you define basic parameters and trigger conditions of an alert.
-
Let us create an alert that checks every 10 minutes if there are servers in your environment that utilize more than 50% of CPU, and sends a text message to both email and mobile phone about such events.
Specify the following settings:
-
Name: alert title – CPU Over Limit Alert
-
Group: group of alerts – Default – the Default group will be created if it does not exist
-
Description: optional comments – Send email & SMS if CPU utilization >50%
-
Environment: choose Global from the list-box if you want to execute a SQL query at the DB server where MMDB is stored or request some URL. Or choose one of you connected Tableau environments if you want to execute it at the DB server where Tableau Repository of this environment is stored.
For our example, choose Global.
If the alert is Global, the following additional settings are available:
-
Type: for our example, choose SQL Script from the list-box.
If the type is SQL Script:
-
SQL: Modify Script: click this button to open the Modify SQL Script dialog box and supply a SQL script there
-
Purge report data: not applicable to Tableau Edition
-
Write to metrics DB: if checked, result set of your query will be saved to the metrics schema – leave it empty now
-
Save as ZIP: if checked, result set will be archived with ZIP before sending via email – leave it empty now
-
Add enterprise alias: not applicable to Tableau Edition
-
Pause Instance (Schedule): not applicable to Tableau Edition
-
Delete object(s), purge Inbox, empty groups/folders: not applicable to Tableau Edition
-
Disable Users: not applicable to Tableau Edition
-
Copy user preferences: not applicable to Tableau Edition
If the type is URL:
-
URL: specify the URL to be requested
-
Timeout: timeout in seconds for this request.
-
If the alert is local to your Tableau environment, then the only option you have is to write a SQL query that will be executed in the corresponding Tableau Repository.
-
-
-
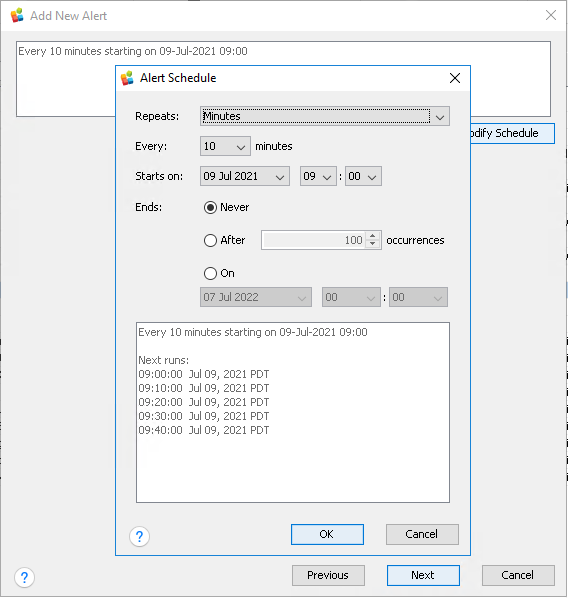
Click Next. The second step opens. At this step, you define how often your new alert runs.
-
Click Modify Schedule. The Alert Schedule dialog box opens:
-
Repeats: choose a time measurement unit – minutes
-
Every: choose an integer value from a list box ‐ 10 for 10 minutes interval
-
Starts on: choose date and time when this alert should run for the first time. The timestamp will be saved with a timezone set on your MMTE Server system.
-
Ends: Never for continuous usage, After X occurrences or On <timestamp> for limited usage
Check in the text area below the resulting data: overall description of the schedule and next five runs.
-
-
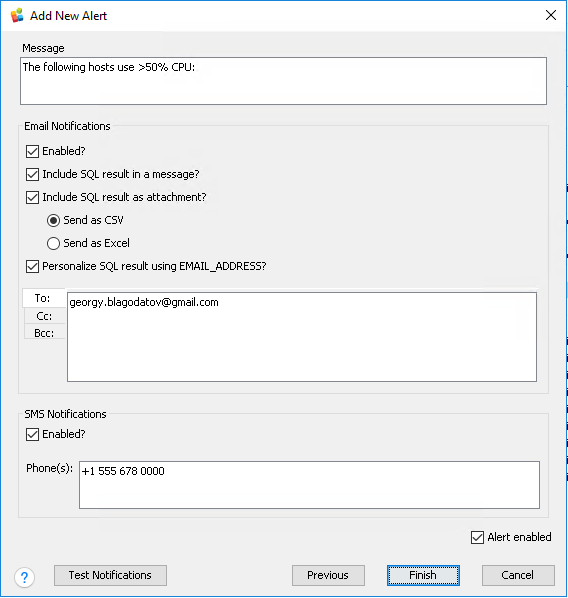
Click OK. Click Next. The third step opens. At this step, you define how notifications about your new alert are to be sent.
-
Message: enter the main text of the notification message(s) that will be inserted between the MMTE Server hostname and the result set in the message body
-
Email Notifications group:
-
Enabled? if checked, email notification(s) will be sent
-
Include SQL result in a message? if checked, the result set in a tabular form will be included in the message body
-
Include SQL result as attachment? if checked, the result set will be attached to the email message as a standalone file in one of the following formats:
-
Send as CSV: comma separated text format, extension
.csv -
Send as Excel: Microsoft Excel XML proprietary file format, extension
.xlsx
-
-
Personalize SQL result using EMAIL_ADDRESS? If checked and if the result set contains a column named EMAIL_ADDRESS, the email notification will also be sent to addresses found in this column. If checked and there is no EMAIL_ADDRESS column, an error will be reported while executing the alert.
-
To: specify one or more recipients (email addresses)
-
Cc: specify one or more email addresses to send a carbon copy
-
Bcc: specify one or more email addresses to send a blind carbon copy
The sender name will be taken from the Email Header Text setting specified in MMTE Administrator.
-
-
SMS Notifications group:
-
Enabled? if checked, SMS notification(s) will be sent
-
Phone(s): specify one or more phone numbers (MSISDN); spaces, commas, etc will be treated as separators
-
-
Alert enabled: if checked, all previously configured notifications for this alert will be sent; otherwise, none will be sent (global alert enablement). You cannot enable alerts without schedules.
-
-
Prior to activating the alert, perform a basic test by clicking the Test Notifications button which tests connectivity to Email and SMS.
-
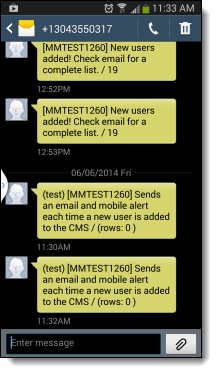
When the test is run, you should get both an email and mobile alert:
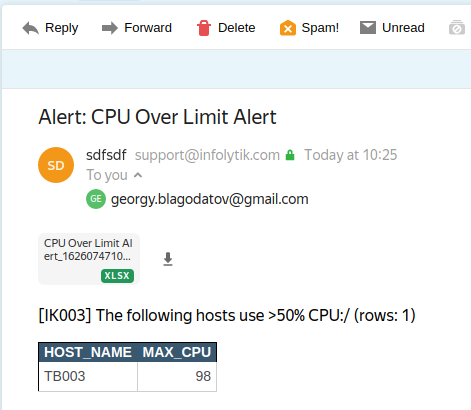
SMS Alert:
-
Once you are ready to run the alert in production, click Alert Enabled and OK.