Add New Workbook Set In One Side Mode
To validate a Workbook Set in the One Side Mode:
- Open the Workbook Validation tab.
-
Click New Workbook Set (one-side mode)... icon in the toolbar, or right-click somewhere in the Workbook Set table and choose New Workbook Set (one-side mode)... in the context menu.
The Add New Workbook Set dialog window opens:
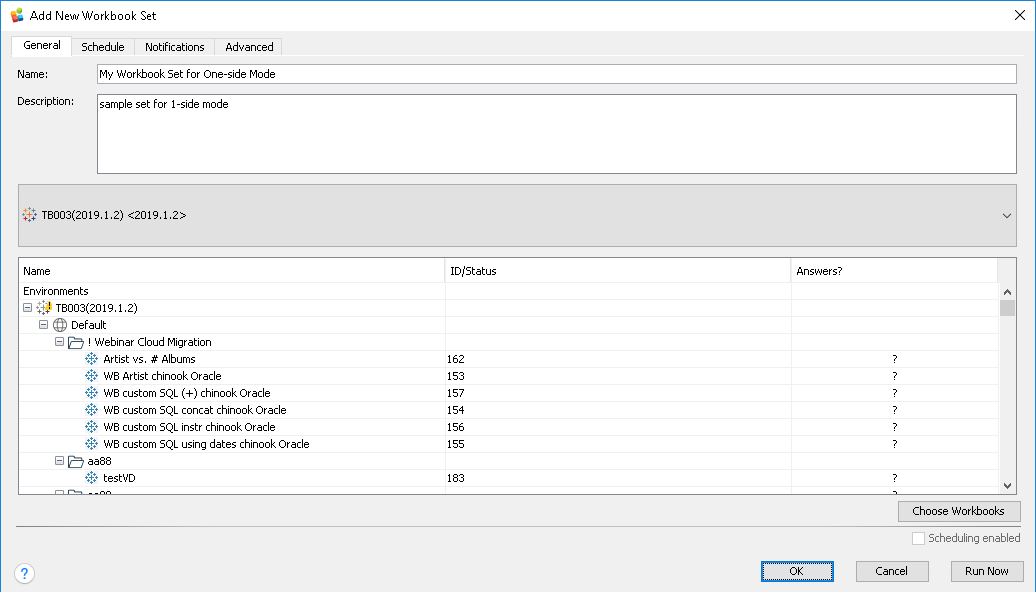
Read here for details.
General Tab
- Specify Name, for example: My Workbook Set for One-side Mode.
- Specify Description, for example sample text for 1-side mode.
- Choose an environment for the left target in the selector (e.g., TB003):
-
Click Choose Workbooks below the left target.
The Choose Workbooks dialog window opens:
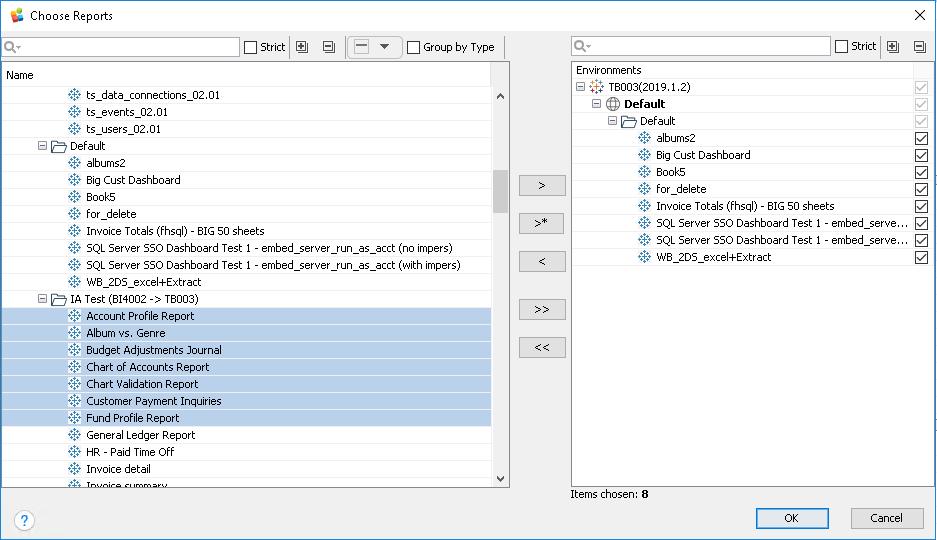
In this dialog window, select workbooks for this set. Read here for details.
-
Click the Schedule tab.
Schedule Tab
The Schedule tab opens:
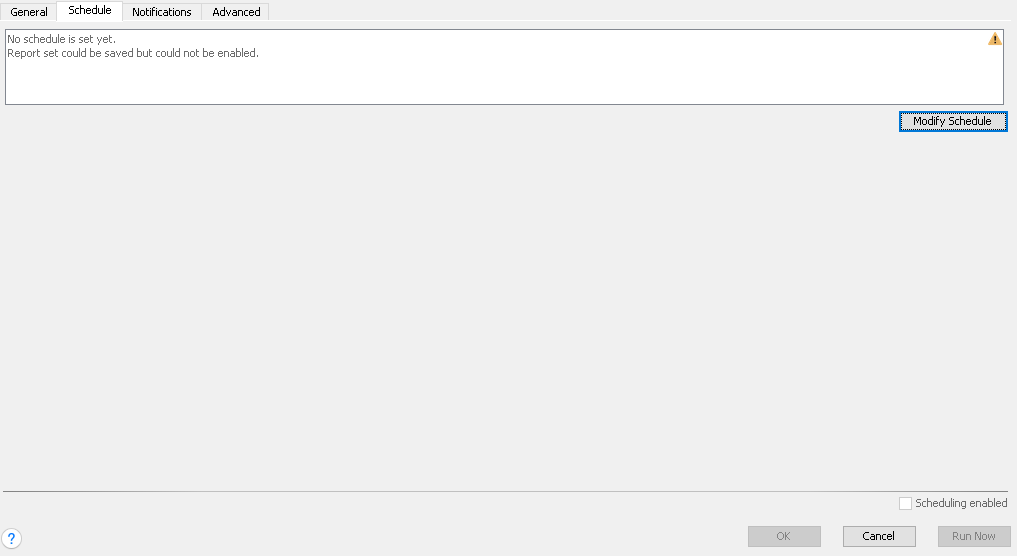
Schedule is very important for automated workbook validation to run this validation on a daily (hourly, weekly) basis.
-
Click Modify Schedule.
The Workbook Set Schedule dialog window opens:
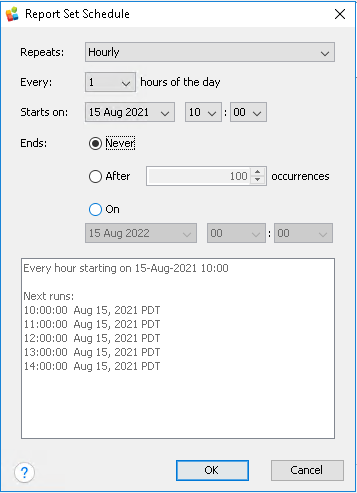
It is similar to the Alert Schedule dialog window.
-
Repeats: choose a time measurement unit – hourly
-
Every: choose an integer value from a list box ‐ 1 for 1 hour interval
-
Starts on: choose date and time when this alert should run for the first time. The timestamp will be saved with a timezone set on your MMTE Server system.
-
Ends: Never for continuous usage, After X occurrences or On <timestamp> for limited usage
Check in the text area below the resulting data: overall description of the schedule and next five runs.
-
-
Click OK.
-
Set the Scheduling enabled checkbox for automatic execution of this Workbook Set validation. You cannot enable workbook sets without schedules.
-
Click the Notifications tab.
Notifications Tab
Here you can configure email and/or SMS notification should you have a discrepancy in your Tableau workbooks.
The Notifications tab opens:
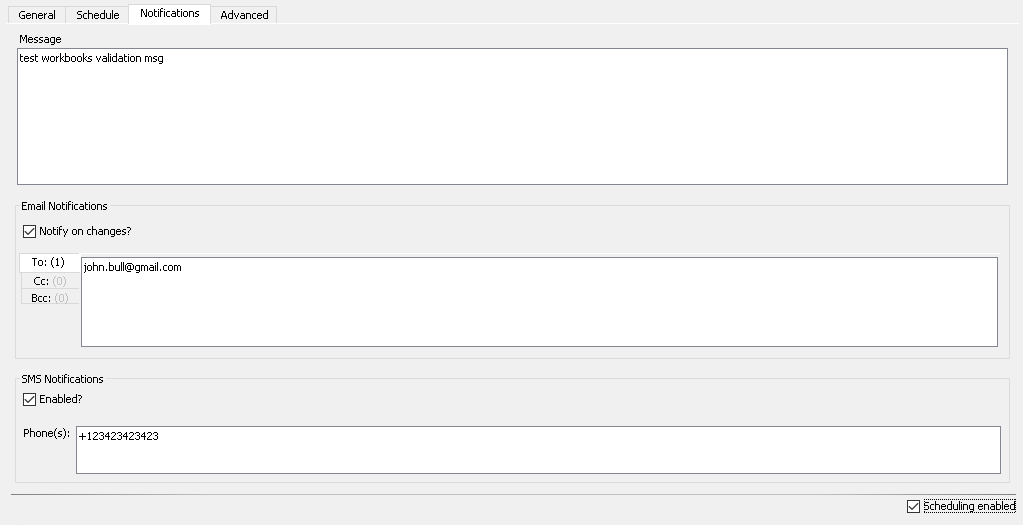
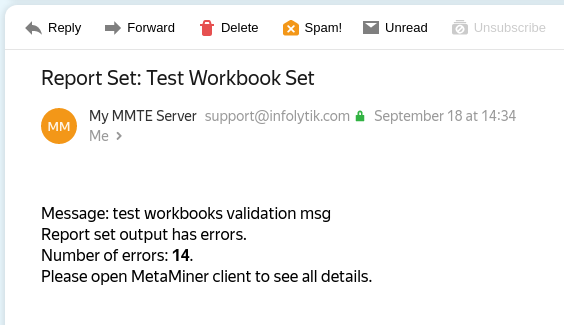
- Specify Message, for example: test workbook validation msg. This text will be sent inside the email and/or SMS notifications in the line titled Message:
-
If you need notifications by email, edit the Email Notifications group settings:
-
Notify on changes? if checked, email notification(s) will be sent
-
To: specify one or more recipients (email addresses)
-
Cc: specify one or more email addresses to send a carbon copy
-
Bcc: specify one or more email addresses to send a blind carbon copy
The sender name will be taken from the Email Header Text setting specified in MMTE Administrator.
-
-
If you need notifications by SMS, edit the SMS Notifications group settings:
-
Enabled? if checked, SMS notification(s) will be sent
-
Phone(s): specify one or more phone numbers (MSISDN); spaces, commas, etc will be treated as separators
-
-
Click the Advanced tab.
Advanced Tab
This tab allows you to configure additional parameters of the workbook validation process.
-
In the Output Options section:
-
Generate PDF: enable workbook validation via conversion to the PDF format
-
Generate XML: enable workbook validation via conversion to the XML format
At least one checkbox must be set.
-
-
Click OK to save a new Workbook Set or click Run Now to save and run validation immediately.
Using Workbook Output Issues
After a Workbook Set is created and run at least once, there should be at least one row for it in the Table of Validation Results.
-
Select the latest row in the Table of Validation Results.
-
Click the link in the Issues column.
The Workbook Output Issues dialog window opens.
-
Inspect the workbooks with the FAILED status. When you select such workbook, the stacktrace of the error is displayed at the bottom of this dialog window.
-
The task is to fix all errors in the new environment or consider them not important.