Filter Pane
Your BI assets can be deep and vast. It can be an difficult task to find, to filter the information which is only relevant for your needs.
For this reason, MetaMiner offers tools to quickly and easily filter across and down your data. These tools are Filter Pane and Smart Selector.
Filter Pane contains several groups of filters. Depending on which tab is currently opened, the set of filter groups may vary.
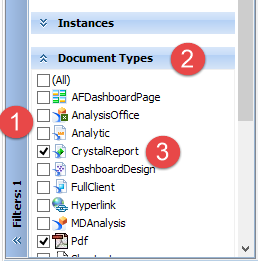
![]() Filter Pane title (caption)
Filter Pane title (caption)
![]() Filter group title (caption)
Filter group title (caption)
![]() A filter in the group, applied to your BI data
A filter in the group, applied to your BI data
Filter Types
There are several types of filters in MetaMiner. There can be filters of one type or of several types in a filter group.
Filter types are:
| • | Single checkbox: individual filter that can be enabled or disabled, for example, Recurring instances only in the Instances filter group |
| • | Checkbox list: you can select one or more values of the same kind from the list, for example, Document types; such list has a special item (All) that clears/sets all checkboxes in this list altogether |
| • | Checkbox list with search: same as above, but with an additional search field; the list of available filters shortens as you type, leaving only those filters that match your input, for example, Universes filter group |
![]() Tip
Tip
The search is not case sensitive.
In filters with search the special item (All) changes to (All Filtered) as you start to type, because in such cases when you check this item, only all filters that match your input apply, and not completely all filters:
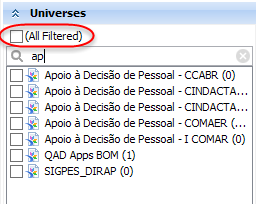
| • | Time interval: you define two dates, "not earlier" and "not later", or just one of them; you select those dates using a calendar control that appears when you click the field: |
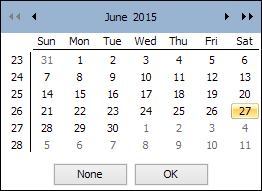
You click None to reset the value; example: Update Time filter group.
All tabs include Environments filter group. Other filter groups can be displayed under certain tab or not. All available filter groups are described later in this documentation, in detail.
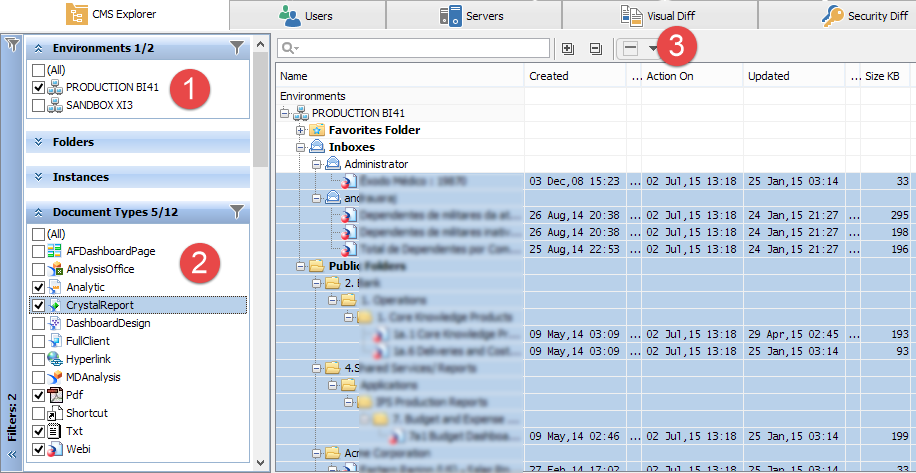
All filters selected in one list are applied using 'OR'. In other words, if you select 2 of 3 document types available in your landscape, the object will be displayed in Content Area, if it belongs to one document type or another:
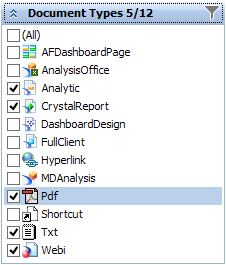
You see in the filter group caption that 5 of 12 filters from the list are selected, and color of this filter group caption changes.
All filters, filter groups, and Smart Selector are applied using 'AND'. That means, if you select an Environment filter ![]() , and a Document Type filter
, and a Document Type filter ![]() , and apply Smart Selector
, and apply Smart Selector ![]() , an object will be displayed in Content Area, only if it belongs to the selected environment, and it is of a selected type, and satisfies the configured Smart Selector settings:
, an object will be displayed in Content Area, only if it belongs to the selected environment, and it is of a selected type, and satisfies the configured Smart Selector settings:
Expand and Collapse Filter Pane
You can expand or temporarily collapse Filter Pane on the screen. By default, Filter Pane is expanded. You may want to edit MM Client preferences to display Filter Pane on startup.
To collapse Filter Pane, when it is shown:
| • | On View menu, choose Filter Pane, or |
| • | Press Ctrl + E or Ctrl + T, see also Keyboard Shortcuts, or |
| • | Click the title (caption area) of Filter Pane: |
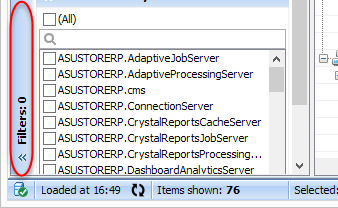
Filter Pane is now collapsed. To expand it, perform the same action (described above) again.
Expand and Collapse Filter Groups
You can also expand or temporarily collapse any individual filter group. By default, all filter groups are collapsed.
To expand a filter group, when it is collapsed, click the title (caption area) of this group:
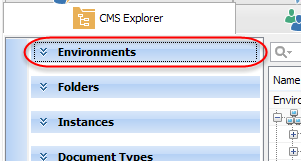
The selected filter group is now displayed. To collapse it, perform the same action (described above) again.
Reset Filters
You may want to stop applying some or all of your filters to the BI data.
To get information on how to stop applying all filters, Quick Search Control, and Smart Selector, please consult the topic View - Reset All Filters.
To stop applying all filters, click the ![]() icon at the top left corner of Filter Pane:
icon at the top left corner of Filter Pane:
To stop applying filters of one certain group, do one of the following:
| • | Click the |

or
| • | Check the (All) checkbox in this filter group, if this group consists of just one filter list, or |
| • | Clear all checkboxes in this filter group. |
Filters from this group are not applied to your BI data any longer.
Example
For example, if I were to analyze only those failed instances of type PDF, I would access the following filter groups from the CMS Explorer tab: Instances and Document Types:
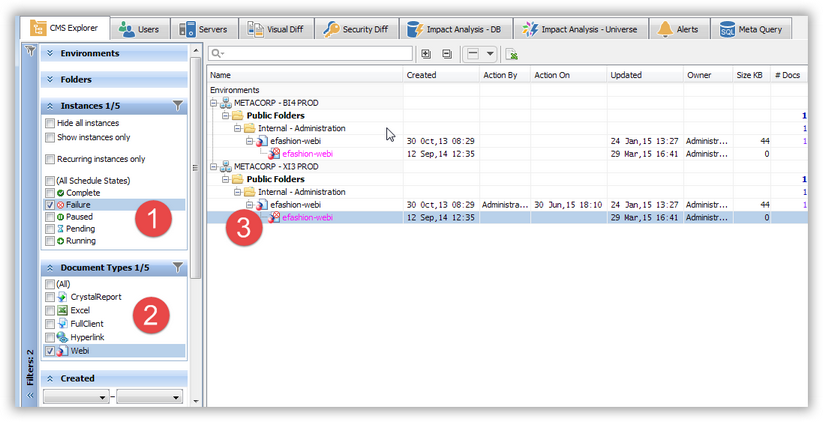
![]() Instances filter group: Here we restrict by Failures
Instances filter group: Here we restrict by Failures
![]() Document Types filter group: Select PDF to see only those failed instances
Document Types filter group: Select PDF to see only those failed instances
![]() Content Area: The tree is now filtered instantly for three environments and their failed PDF instances.
Content Area: The tree is now filtered instantly for three environments and their failed PDF instances.
See also